
How to Install a Spring Kit on Your UTV
Posted by Dustin Robbins on Sep 25th 2025
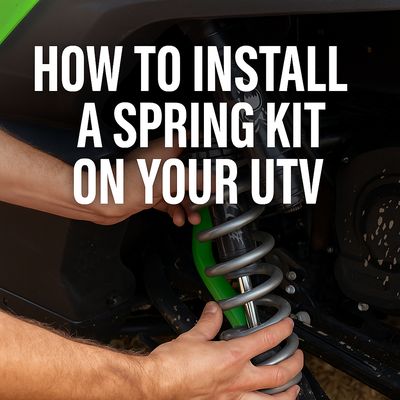
How to Install a Spring Kit on Your UTV
A properly tuned suspension is one of the best upgrades you can make to your UTV. Stock springs often sag over time, leaving you with poor ride quality, less ground clearance, and uneven handling. That is why many riders choose to install aftermarket spring kits—they restore ride height, improve handling, and add comfort across every terrain.
This guide walks you through the process of installing a spring kit on your UTV, so you can enjoy better performance and more confidence on the trail.
Why Upgrade to a Spring Kit?
Spring kits provide several key benefits:
-
Restored or increased ride height for better ground clearance
-
Improved handling through better spring rates and balance
-
Enhanced ride comfort over bumps, rocks, and ruts
-
Better load-carrying ability for accessories, passengers, or cargo
-
Longer shock life by reducing strain on your suspension components
If your machine feels rough, bottoms out often, or sits lower than it used to, a spring kit is a smart upgrade.
Tools and Equipment You’ll Need
-
Floor jack and jack stands
-
Socket set and wrenches
-
Spring compressor (recommended for safety)
-
Torque wrench
-
Shop cloth and gloves
-
Eye protection
Step 1: Prepare Your UTV
Park your machine on level ground, engage the parking brake, and remove the key. Loosen lug nuts if needed to remove wheels for easier access to shocks. Safely lift the UTV with a jack and support it with jack stands.
Step 2: Remove the Shocks
Using the appropriate sockets, unbolt the shocks from the suspension arms and frame mounts. Depending on your UTV, you may need to remove wheels for clearance. Carefully set each shock aside for spring replacement.
Step 3: Compress and Remove Old Springs
Secure each shock in a spring compressor. Compress the spring just enough to relieve pressure from the retaining collar. Remove the retainer and slowly release spring tension. Slide off the old spring(s) and inspect the shock body for wear or damage.
Step 4: Install the New Springs
Slide your new spring kit components onto the shock in the proper order. Some kits include tender springs, crossovers, or dual-rate setups, so follow the instructions for your specific kit. Reinstall the retaining collar, making sure it seats correctly.
Step 5: Reinstall Shocks on the UTV
Mount the shocks back onto the suspension arms and frame. Torque bolts to manufacturer specifications. If you removed the wheels, reinstall and torque the lug nuts in a star pattern.
Step 6: Set Preload and Ride Height
Adjust spring preload according to the instructions provided with your kit. This determines ride height and suspension balance. Measure ground clearance at all four corners to confirm proper setup.
Step 7: Test and Fine-Tune
Take your UTV for a short test ride over varying terrain. Pay attention to ride height, handling, and comfort. Make small preload adjustments as needed to dial in your setup.
Final Thoughts
Installing a spring kit transforms your UTV’s ride quality and handling. With the right tools and some patience, it is a job most owners can do in their garage. The result is a smoother ride, more control, and the confidence that your suspension is built to handle whatever you throw at it.
At All Thingz UTV, we stock thousands of springs in over 19 colors—all backed by our 100% satisfaction guarantee and lifetime warranty. Whether you want to restore your ride or take it to the next level, we have the right spring kit for your machine.