
How to Mount UTV and ATV Wheels
Posted by SuperATV Staff on Sep 25th 2025
Why Getting Wheel Installation Right Matters
When you get a set of wheels, there are two keys to making sure they’re all you’ve dreamed of: correctly mounting tires on your new rims and getting the whole unit installed on your rig. Good looks aren’t the (only) reason you got your new wheels, so if you want to get the best possible performance and ride quality, check out this guide. Plus, you’ll avoid the safety issues that come with incorrectly set tires or poorly installed wheels.
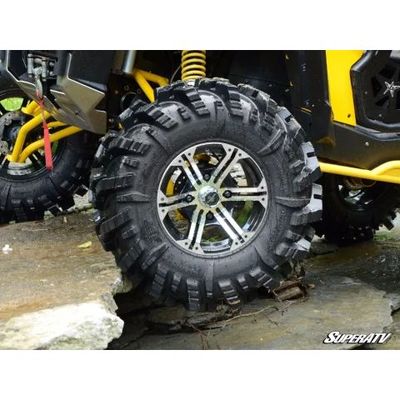
When you’re looking for a new set of wheels, you need options that provide the performance you want and can stand up to your toughest rides. SuperATV has just what you need, with premium beadlock and standard wheel options for you to choose from. No matter your style or how you ride, we’ve got the perfect wheels for you — just follow these handy tips to install them on your UTV or ATV the right way.
Table of Contents
Tools and Materials Needed
Before you start, gather everything to both install tires on your wheels and the wheels on your machine, including:
- Torque wrench
- Ratchet
- Tire irons
- Lug wrench
- Jack
- Tire balancing stand
- Tire lubricant
- Anti-seize lubricant (if you have beadlock wheels)
- Gloves
- Goggles
- Wire brush
- Shop cloth
You should also find a piece of foam, a blanket, or something similarly protective that you can use to protect the finish of your wheels when you lay them down.
Should You Use Wheel Spacers or Adapters?
If you’ve made some upgrades to your suspension or have gone up in wheel size, you may need to add wheel spacers to ensure you have the right offset and clearance. Similarly, if you must change your bolt pattern to match your new wheels to your machine, wheel adapters can provide the help you need. Lucky for you, SuperATV has you covered on both fronts.

Part One: Mounting Tires on Your Wheels
1. Clear Your Space
For both installing tires on your wheels and mounting the whole assembly on your machine, you’ll want a flat, secure, and clear space to work on. For tire mounting, you can keep your wheels from getting dinged up by putting a blanket or piece of foam on the ground.
2. Prep Your Tires
Lubricate the rim of the wheel and the bead of the tire with tire lubricant (or a 1:1 mix of water and soap). This will allow you to more easily slide the tire onto the rim. It’s better to over-lubricate than not lubricate enough and damage the tire by trying to force it onto the wheel, so err on the side of using too much.
3. Mount the Tire
Align your tire on the rim correctly. If the tires have a mark indicating the lightest part of the tire, align it with the heaviest part of the wheel, which is the valve stem. This will help keep proper balance. Initially, you should use your hands to mount the tire onto the rim, but you can move on to tire irons to help get the tire fully onto the wheel—just work carefully and in small increments so you aren’t damaging either the tire or the wheel.
4a. Install Beadlock Ring (if Applicable)
If you have beadlock wheels, now is the time to install the beadlock ring. First, put the ring on the wheel face, aligning the holes correctly. Apply a small amount of anti-seize lubricant to each beadlock bolt before hand-turning them, using a star pattern, until they are snug. IMPORTANT: Do not overtighten or tighten to recommended torque yet—this could damage your beadlock ring.
When your bolts are all hand-threaded, it’s time to break out the torque wrench. Set the foot-pounds on your wrench to what is recommended by the beadlock manufacturer and tighten in the same star pattern until all bolts are done.
4b. Seat the Bead (Non-Beadlock)
Once your tire is set on the wheel, inflate it just a bit to help seat the bead—this step is the easiest to try first, but will not always work. If your bead is too far away from the rim and it won’t seat from inflating the tire, you’ll need to use a specialized air blaster. Once the tire is on, make sure that the entire bead is seated around the rim and that there are no gaps or uneven spaces.
5. Inflate!
After the tire is properly seated, inflate using an air compressor. Consult the owner’s manual to find the recommended psi specifications and use a tire gauge to make sure you’re hitting the mark.
Check the bead periodically during inflation to make sure it is still seated correctly. If it starts to seat unevenly, stop inflating and reset the bead.
6. Balance and Repeat
Use a tire balancing tool to make sure your assembly is properly balanced (you can also have a local pro handle this if you don’t have a tire balancing tool or want help). Follow these same steps for the rest of your tires and wheels to get your full set ready to mount onto your machine.

Part Two: A Step-By-Step Guide for Installing Your Wheels and Tires on Your UTV or ATV
1. Prepare Your Rig
Clear your work surface to make enough space for your UTV or ATV to park. Set the parking brake before turning your machine off and removing the key. Bring over your jack and lug wrench—keep your torque wrench and ratchet handy, as well. Make sure you have your safety glasses and gloves, then we can get started putting your new wheel and tire assemblies onto your machine.
2. Safely Lift the ATV/UTV
Use your jack to lift one end of your rig off the ground. You can also make your setup more secure by using jack stands to improve stability. Once the tire and wheel assembly is completely off the ground, you can move to the removal step.
3. Remove the Old Wheel Assembly
Break out your lug wrench to first loosen and then remove the lug nuts. Similarly to when you tighten, you don’t want to completely remove one of the lug nuts before starting to loosen the others—loosen them all a little bit at first and then remove.
After the lug nuts are off, you can slide the old wheel assembly off of the hub. Now, take a cloth and clean away any debris that is on the hub. If you have corrosion or hard-to-remove grime, you can use your wire brush to finish the job.
4. Align and Mount the New Wheel Assembly
Carefully align the bolt holes of your new wheel with the studs on the wheel hub. This is where you may need an adapter if your new wheel doesn’t match your lug pattern. Slide your wheel assembly on, so it is flush and correctly seated against the hub. Thread the lug nuts on by hand in a star pattern to avoid potential cracking or cross-threading.
A note on lug nuts: if your new wheel set comes with new lug nuts, use them. Reusing the old set could set you up for failure down the road.
5. Tighten Lug Nuts—But Not All the Way
Use your lug wrench and the same star pattern you used to hand thread your lug nuts to tighten them further. Don’t overtighten at this point; you just want to get them snug. Using the star pattern will keep the pressure even and keep you from warping your new assembly before it’s even been on the ground.
5.5 Don’t Forget the Other Wheel!
Go through steps three through five on the other side while your machine is still on the jack.
6. Lower the Jack and Torque the Lug Nuts
Carefully lower the jack until your rig is back on the ground. Go back for your torque wrench and tighten each lug to the manufacturer’s specifications—don’t forget your star pattern! Once you reach those specifications, be sure you don’t overtighten, as this has the potential to cause cracking issues, warping, and other damage.
6.5 Now, the Front—or Back
Follow steps two through six on whichever end of your rig wasn’t already on the jack.
7. Recheck and Test the Installation
Once all your new wheel assemblies are mounted on your UTV or ATV, it’s time to test them out by—how else—taking a quick spin. Pay attention to any wobbles, unusual noises, or handling difficulties. Once you’ve finished a short ride, double-check the torque of every bolt and lug nut to see if anything has come loose. You should also inspect your wheel clearance and alignment, while also staying on the lookout for any signs of rubbing. If everything is still up to spec and you haven’t noticed any issues, you’re ready to ride!
Ride Confidently With SuperATV
If you’re looking for a set of wheels to mount on your rig, SuperATV has you covered. We have a great selection of beadlock and standard wheel options—plus plenty of awesome tire options you can choose from. Whether you like to hit the trails, power through mud pits, climb rocks, tear up dunes, or just put your machine to work, you’ll find the perfect fit at SuperATV. Plus, if you want to skip mounting tires on your wheels yourself, we have premounted options or we can mount your tires for you!
If you have any questions about the process of mounting your tires or how to install your wheel assembly on your UTV or ATV, reach out to us or leave a comment down below—we would be happy to help. Once you have your new wheels, don’t forget to show ’em off! Send us photos or tag us in your post—we love seeing what our riding community is getting up to.